
Gpcalero's "The Duke" H3T Alpha Build
#11
 10-09-2021 | 01:09 PM
Thread Starter
|
Senior Member
Joined: Mar 2012
Posts: 295
From: SW Florida
I have been off of work due to head injury so I have decided to post more on the thread on here. One of the first things on the to-do list was clean up the STARR HID headlights. They were looking a bit hazy and yellowish when I took her home, so I ordered up a headlight restoration kit from Chemical Guys and cleaned them up.

For those looking to do this, not hard at all to do, just take your time and it'll come out great.

They came out crystal clear. I was very pleased with the results. No more of that old grungy car look with the yellow hazy lights. One of the additional steps I took was to use a headlight lens clear coating from Meguiar's. I didn't take a picture of it, but it will help your lens finish last longer and adds a layer of protection.
Next up was to fix the actual lights themselves. One of the ballasts ended up falling, so I contacted my buddies from GTR Lighting that I have had great relations with from my last build and bought new 55w ballasts and 5k bulbs. New and old ballasts side by side.

And finally, took a little sunset wheeling trip on some Florida trails.

For those looking to do this, not hard at all to do, just take your time and it'll come out great.
They came out crystal clear. I was very pleased with the results. No more of that old grungy car look with the yellow hazy lights. One of the additional steps I took was to use a headlight lens clear coating from Meguiar's. I didn't take a picture of it, but it will help your lens finish last longer and adds a layer of protection.
Next up was to fix the actual lights themselves. One of the ballasts ended up falling, so I contacted my buddies from GTR Lighting that I have had great relations with from my last build and bought new 55w ballasts and 5k bulbs. New and old ballasts side by side.
And finally, took a little sunset wheeling trip on some Florida trails.
#12
10-10-2021 | 01:20 PM
Thread Starter
|
Senior Member
Joined: Mar 2012
Posts: 295
From: SW Florida
So this package arrived from Texas Speed & Performance... The Duke is getting a camshaft upgrade!


This is a TSP Stage II truck cam. This is the low lift version (still plenty more than stock) and nothing too crazy because I choose to daily drive The Duke and don't want to put in a converter at this point. Specs are 212/218 duration, .550/.550 lift & opted for the lower 111 LSA option. This does a couple different things for me. 1) it brings the power in sooner/lower in the power band, and 2) the lower LSA will typically "chop" more pronouncedly for that V8 muscle sound. Since it's a truck, I want the power to come in more on the bottom end. Also included was an ARP cam bolt (more on that later) and GM Performance LS6 valve springs to handle the extra lift on this cam.
Then, it was off the the dyno to first put down some baseline numbers. So, off to my buddy's shop where he had an AWD dyno.

Only issue here was that even with the dyno adjusted to it's max AWD length, the wheelbase of the H3T was just too long for it. It was just a few inches short of where we would be comfortable with running it. I wanted AWD numbers to give me a more realistic figure of what the truck would be putting down on an everyday basis, but not a huge issue for me that we could not. Instead, I locked the transfer case in 4-High and removed the front driveshaft. That way it was rear-wheel drive only. From here on out, I'll be dynoing in RWD to measure gains after the cam swap.
Here's a video of one of the runs. This is all I took because the traction control system was being a pain to deal with. Things is more fussy than my Mustang. As some of you may know, the traction control system on some models (I think the later ones) aren't fully defeatable with the traction control switch so it'll like to kick in and toast the brakes, pull power etc. So just take the easy way out and find the traction control fuse and yank that sucker out before you dyno.
dwTwW3O.mp4
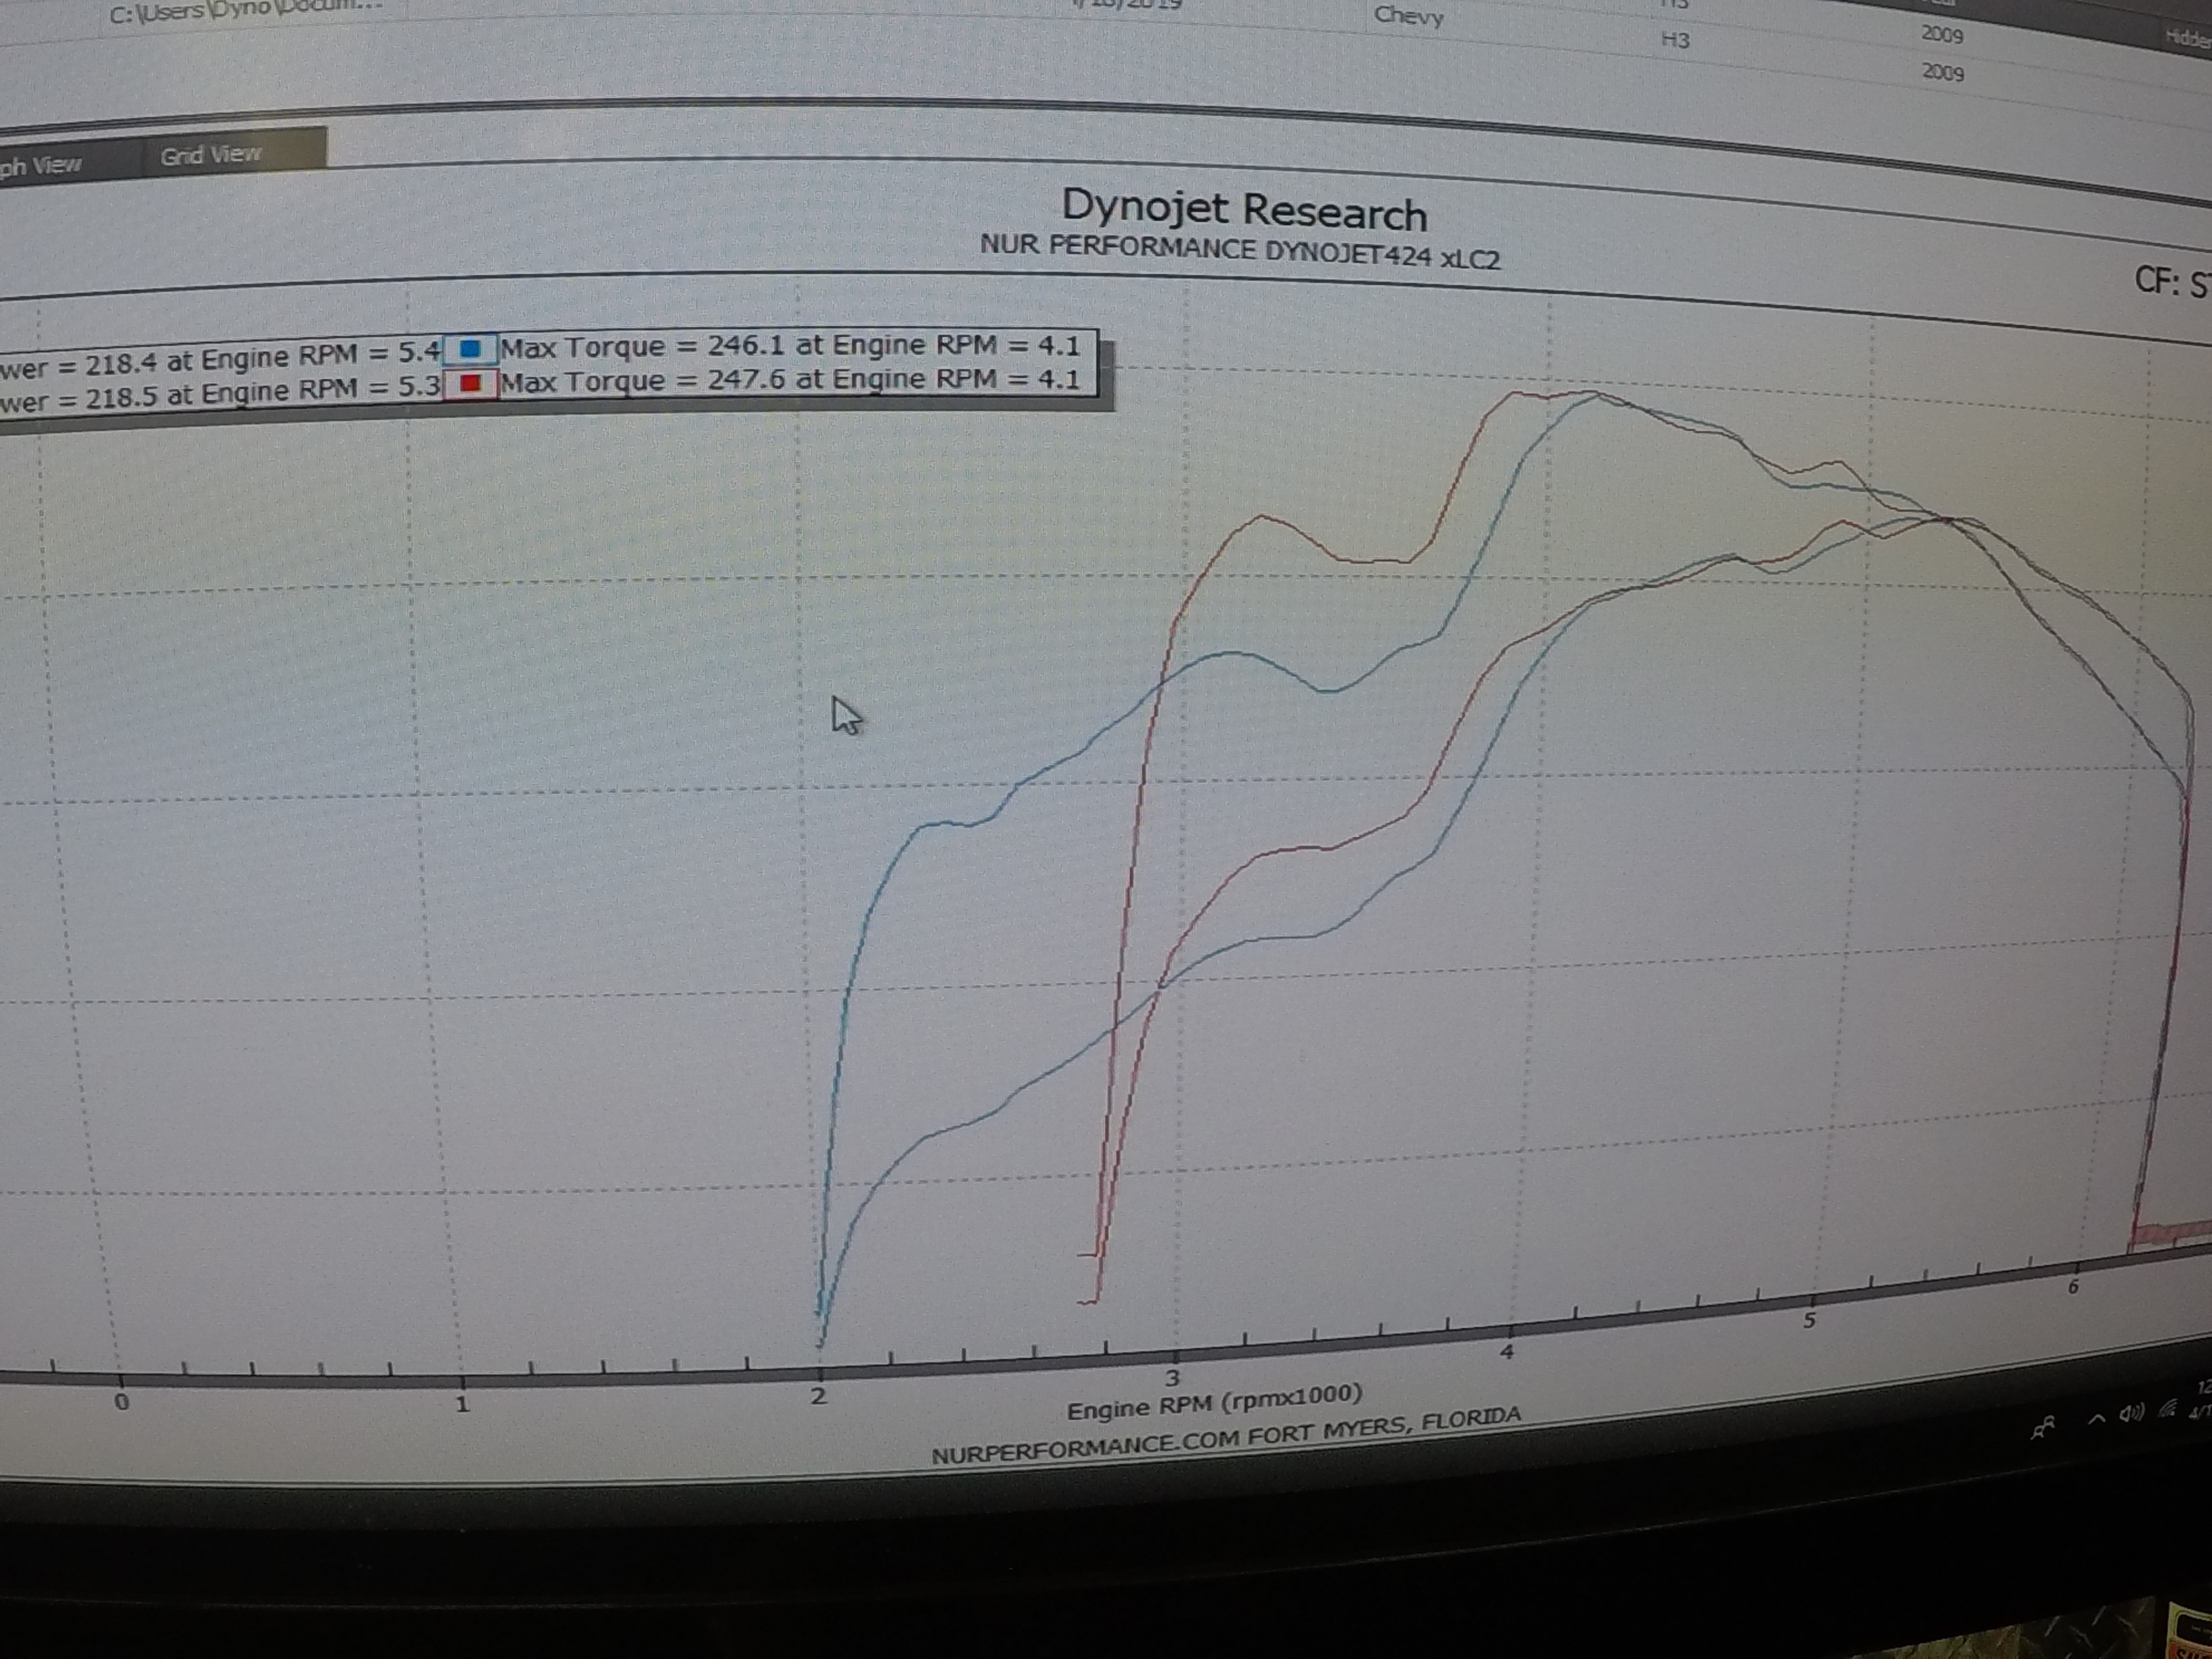
And finally, the part we really care about, are the baseline numbers. This is almost completely stock, with the exception of a 40-series muffler and 33" Nitto Trail Grapplers (same size as OEM on this truck but probably heavier).
Put down 218 HP, 247 TQ to the rear wheels. Assuming 300 flywheel HP as advertised, the driveline and tires soak up quite a bit of power.
With the baseline numbers done, a few more parts are needed to be ordered before install.
Stay tuned!
This is a TSP Stage II truck cam. This is the low lift version (still plenty more than stock) and nothing too crazy because I choose to daily drive The Duke and don't want to put in a converter at this point. Specs are 212/218 duration, .550/.550 lift & opted for the lower 111 LSA option. This does a couple different things for me. 1) it brings the power in sooner/lower in the power band, and 2) the lower LSA will typically "chop" more pronouncedly for that V8 muscle sound. Since it's a truck, I want the power to come in more on the bottom end. Also included was an ARP cam bolt (more on that later) and GM Performance LS6 valve springs to handle the extra lift on this cam.
Then, it was off the the dyno to first put down some baseline numbers. So, off to my buddy's shop where he had an AWD dyno.
Only issue here was that even with the dyno adjusted to it's max AWD length, the wheelbase of the H3T was just too long for it. It was just a few inches short of where we would be comfortable with running it. I wanted AWD numbers to give me a more realistic figure of what the truck would be putting down on an everyday basis, but not a huge issue for me that we could not. Instead, I locked the transfer case in 4-High and removed the front driveshaft. That way it was rear-wheel drive only. From here on out, I'll be dynoing in RWD to measure gains after the cam swap.
Here's a video of one of the runs. This is all I took because the traction control system was being a pain to deal with. Things is more fussy than my Mustang. As some of you may know, the traction control system on some models (I think the later ones) aren't fully defeatable with the traction control switch so it'll like to kick in and toast the brakes, pull power etc. So just take the easy way out and find the traction control fuse and yank that sucker out before you dyno.
dwTwW3O.mp4
And finally, the part we really care about, are the baseline numbers. This is almost completely stock, with the exception of a 40-series muffler and 33" Nitto Trail Grapplers (same size as OEM on this truck but probably heavier).
Put down 218 HP, 247 TQ to the rear wheels. Assuming 300 flywheel HP as advertised, the driveline and tires soak up quite a bit of power.
With the baseline numbers done, a few more parts are needed to be ordered before install.
Stay tuned!
#13
10-11-2021 | 10:59 AM
Thread Starter
|
Senior Member
Joined: Mar 2012
Posts: 295
From: SW Florida
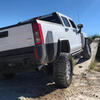
Decided to take the T on another little off-road trip to Lazy Springs Park with a few friends. Not much around here to get in to like some of you boys up north, but still had quite a bit of fun.


Testing out the stock front articulation

And the rear...


And of course I had to go through the mud hole lol. Love this shot

Any local SWFL H3/H3T owners in here?
Testing out the stock front articulation
And the rear...
And of course I had to go through the mud hole lol. Love this shot
Any local SWFL H3/H3T owners in here?
#14
10-12-2021 | 01:21 PM
Thread Starter
|
Senior Member
Joined: Mar 2012
Posts: 295
From: SW Florida
The Bad News:
So next in the time line of The Duke really pissed me off, and I'm sure many of my fellow enthusiasts feel the same way when something like this happens. Actually I dread things like this happening because of the amount of time and money spent underneath a vehicle to make them unique to us.
My girlfriend and I went out for breakfast at Cracker Barrel one day and came out to the grill caved in on the drivers side. This is what it looked like after I took the corner piece that broke off. I have no doubt in my mind that it had to be a lifted early 90's Ford pick-up that parked in front of me and probably reversed in to my bumper. No note, no number or anything. Just my poor H3T backed up in the back of the lot and it still got hit. It's tough but it wasn't too bad after the shop took everything apart. The worst part for me was that these were STARR HIDs and they don't make them anymore. Needed new grill, mounting brackets for headlights and fog lights, new headlights, new driver's side fog light, new bumper while we were at it (it was fine, just scuffed), new side marker lights, and a touch-up paint kit on the edge of the hood. Fender was fine luckily, that black spot wasn't a scuff.

Since the STARR HIDs weren't available anymore, we ordered a new headlight kit from HIDprojectors.com. The 7" Jeep headlight retrofit kit from German at Lased Designs wasn't out at the time, otherwise I would have ordered that because I personally think that they look fantastic.
The Good News:
Not long after, I got word that Rancho somehow found 20 of their 4" suspension lift kits sitting in their warehouse sitting brand new in the box and I immediately jumped on it. I've always wanted the kit and felt incredibly lucky to buy a platform that they didn't manufacture a kit for in YEARS and be able to be a part of the small group of people who bought 1 of these 20 inventory slip ups.


Felt like Christmas morning when I received the shipping confirmation email!!
So next in the time line of The Duke really pissed me off, and I'm sure many of my fellow enthusiasts feel the same way when something like this happens. Actually I dread things like this happening because of the amount of time and money spent underneath a vehicle to make them unique to us.
My girlfriend and I went out for breakfast at Cracker Barrel one day and came out to the grill caved in on the drivers side. This is what it looked like after I took the corner piece that broke off. I have no doubt in my mind that it had to be a lifted early 90's Ford pick-up that parked in front of me and probably reversed in to my bumper. No note, no number or anything. Just my poor H3T backed up in the back of the lot and it still got hit. It's tough but it wasn't too bad after the shop took everything apart. The worst part for me was that these were STARR HIDs and they don't make them anymore. Needed new grill, mounting brackets for headlights and fog lights, new headlights, new driver's side fog light, new bumper while we were at it (it was fine, just scuffed), new side marker lights, and a touch-up paint kit on the edge of the hood. Fender was fine luckily, that black spot wasn't a scuff.
Since the STARR HIDs weren't available anymore, we ordered a new headlight kit from HIDprojectors.com. The 7" Jeep headlight retrofit kit from German at Lased Designs wasn't out at the time, otherwise I would have ordered that because I personally think that they look fantastic.
The Good News:
Not long after, I got word that Rancho somehow found 20 of their 4" suspension lift kits sitting in their warehouse sitting brand new in the box and I immediately jumped on it. I've always wanted the kit and felt incredibly lucky to buy a platform that they didn't manufacture a kit for in YEARS and be able to be a part of the small group of people who bought 1 of these 20 inventory slip ups.
Felt like Christmas morning when I received the shipping confirmation email!!
#15
10-13-2021 | 02:49 PM
Thread Starter
|
Senior Member
Joined: Mar 2012
Posts: 295
From: SW Florida
Big install weekend is here. Had a bunch of parts sitting in the garage at the time that I decided to install during a free weekend.
Without boring you with all of the preliminary steps to get there, here is the money shot

This is the Texas Speed Stage II Truck cam. I used the dowel method so I didn't have to pull the heads to install.
And another view with the socket wrench in the cam bolt hole for more leverage. And you can also see the updated style chain tensioner.

This is the stock LH8 chain tensioner next to the later LS3 style chain tensioner.

And here is the stock LH8 single bolt cam gear. The new cam (and most aftermarket LS cams) are the 3-bolt design so you will need a new cam timing gear and bolts to install. I used ARP bolts while I was at it.

New valve seal next to the old one (I ripped the seal while inspecting lol).

I used this cheap valve spring compressor off of Amazon to remove the old springs and install the new ones. And draining all the GM antifreeze from the system and replacing with Redline Water Wetter since the truck doesn't need the antifreeze properties here in FL and the Water Wetter cools much better. Use the same stuff on my turbo mustang.

LS6 blue valve springs installed to handle the extra lift. Passenger side.

Drivers side done.

Making multiple posts so I don't lose progress lol.
Without boring you with all of the preliminary steps to get there, here is the money shot
This is the Texas Speed Stage II Truck cam. I used the dowel method so I didn't have to pull the heads to install.
And another view with the socket wrench in the cam bolt hole for more leverage. And you can also see the updated style chain tensioner.
This is the stock LH8 chain tensioner next to the later LS3 style chain tensioner.
And here is the stock LH8 single bolt cam gear. The new cam (and most aftermarket LS cams) are the 3-bolt design so you will need a new cam timing gear and bolts to install. I used ARP bolts while I was at it.
New valve seal next to the old one (I ripped the seal while inspecting lol).
I used this cheap valve spring compressor off of Amazon to remove the old springs and install the new ones. And draining all the GM antifreeze from the system and replacing with Redline Water Wetter since the truck doesn't need the antifreeze properties here in FL and the Water Wetter cools much better. Use the same stuff on my turbo mustang.
LS6 blue valve springs installed to handle the extra lift. Passenger side.
Drivers side done.
Making multiple posts so I don't lose progress lol.

#17
10-14-2021 | 02:49 PM
Thread Starter
|
Senior Member
Joined: Mar 2012
Posts: 295
From: SW Florida
I look forward to sharing more with you guys

#18
10-14-2021 | 02:51 PM
Thread Starter
|
Senior Member
Joined: Mar 2012
Posts: 295
From: SW Florida
Install Weekend Part 2!
New radiator from ECP.

This one was kind of a pain but the radiator itself is very nice. All aluminum unit and this puppy is a 2-row rad with 1" tubes. I'm not too sure on the specs of other aftermarket aluminum radiators but I think this might be one of the biggest you can get. See below. Regardless, it is a MUCH better upgrade than the tiny 1 row OEM radiator, and not expensive like some of the other offerings out there.
Nothing was was wrong with my stock radiator, I just figured that now was the time to upgrade since I had to remove it anyways for the cam install.

Stock rad is about 1 inch wide.

ECP rad is 2 & 3/8ths inches thick, as measured from the side on both. More than twice the size of OEM.

Here you can see just how beefy it is compared to stock! All that extra cooling capacity!

And last view vs. OEM from the tops of the radiators. The welded on top end tank is considerably thicker than the rest of the body, more on that later.

View of the new radiator mock-installed along with a new Alpha cold air intake from Air Doc Intakes and an K&N filter. Some slight trimming to the engine cover is needed if you want to re-use it. Very very minor. In order to run the ECP radiator, you need re-use the side plastic mounting brackets from the OEM rad. Once you remove them, you'll need to dremel out the openings to get the plastic brackets to slide in, it's not perfect.

Next on the list to install was the Deluxe V8 Dual E-Fan from James @ Supermodulation. Sorry for the horrible pic but it was the only one I took.

Because the damn radiator is so thick, I wasn't able to install the E-fans right side up due to the rear of the fans hitting the engine pulley & and brackets. So I flipped them upside down and it cleared with an eighth of an inch. The e-fan kit also came with a sensor that goes inline on the coolant hoses to regulate the fans so you don't have to re-pin your engine harness connectors and get a tune for them.
Here is everything installed. ECP 2 3/8" radiator, dual Supermodulation e-fans & Air Docs intake w/ K&N filter. I think came out extremely clean looking!

So here's my opinion of the ECP radiator....
It's a very nice unit and have zero doubt that my cooling capacity has GREATLY increased. Would I recommend this radiator to you? Maybe not unless you are okay with modifying a few things. First off, the damn thing is so thick that I had to push my condenser forward off of it's mounts and make my own. Other than that, you have to shave down the OEM mounts to install in your H3, and also trim the radiator support brace to get it to fit correctly. You may be able to see this on the last photo on the drivers side of the radiator, where I trimmed the metal back about a 1/16th of an inch and painted white to protect from rust, then added a rubber trim piece to prevent metal-to-metal contact. On top of that, if I hadn't purchased the dual e-fan kit, there is no way you can run the stock mechanical fan and radiator shroud, there is simply not enough room.
TLDR: it's rather involved and not a simple swap. But it looks great and it works great. I've had this radiator on my truck for over a year now and have never had a cooling issue, even when towing the Mustang in the FL heat.
New radiator from ECP.
This one was kind of a pain but the radiator itself is very nice. All aluminum unit and this puppy is a 2-row rad with 1" tubes. I'm not too sure on the specs of other aftermarket aluminum radiators but I think this might be one of the biggest you can get. See below. Regardless, it is a MUCH better upgrade than the tiny 1 row OEM radiator, and not expensive like some of the other offerings out there.
Nothing was was wrong with my stock radiator, I just figured that now was the time to upgrade since I had to remove it anyways for the cam install.
Stock rad is about 1 inch wide.
ECP rad is 2 & 3/8ths inches thick, as measured from the side on both. More than twice the size of OEM.
Here you can see just how beefy it is compared to stock! All that extra cooling capacity!
And last view vs. OEM from the tops of the radiators. The welded on top end tank is considerably thicker than the rest of the body, more on that later.
View of the new radiator mock-installed along with a new Alpha cold air intake from Air Doc Intakes and an K&N filter. Some slight trimming to the engine cover is needed if you want to re-use it. Very very minor. In order to run the ECP radiator, you need re-use the side plastic mounting brackets from the OEM rad. Once you remove them, you'll need to dremel out the openings to get the plastic brackets to slide in, it's not perfect.
Next on the list to install was the Deluxe V8 Dual E-Fan from James @ Supermodulation. Sorry for the horrible pic but it was the only one I took.
Because the damn radiator is so thick, I wasn't able to install the E-fans right side up due to the rear of the fans hitting the engine pulley & and brackets. So I flipped them upside down and it cleared with an eighth of an inch. The e-fan kit also came with a sensor that goes inline on the coolant hoses to regulate the fans so you don't have to re-pin your engine harness connectors and get a tune for them.
Here is everything installed. ECP 2 3/8" radiator, dual Supermodulation e-fans & Air Docs intake w/ K&N filter. I think came out extremely clean looking!
So here's my opinion of the ECP radiator....
It's a very nice unit and have zero doubt that my cooling capacity has GREATLY increased. Would I recommend this radiator to you? Maybe not unless you are okay with modifying a few things. First off, the damn thing is so thick that I had to push my condenser forward off of it's mounts and make my own. Other than that, you have to shave down the OEM mounts to install in your H3, and also trim the radiator support brace to get it to fit correctly. You may be able to see this on the last photo on the drivers side of the radiator, where I trimmed the metal back about a 1/16th of an inch and painted white to protect from rust, then added a rubber trim piece to prevent metal-to-metal contact. On top of that, if I hadn't purchased the dual e-fan kit, there is no way you can run the stock mechanical fan and radiator shroud, there is simply not enough room.
TLDR: it's rather involved and not a simple swap. But it looks great and it works great. I've had this radiator on my truck for over a year now and have never had a cooling issue, even when towing the Mustang in the FL heat.
#19
10-15-2021 | 11:18 AM
Thread Starter
|
Senior Member
Joined: Mar 2012
Posts: 295
From: SW Florida
Install Weekend Part 3!
Most of you know what this is. Daystar dash panel. Simple install in 30 seconds and looks good imo.

Next is a nice little mod to the tailgate so removing the tailgate itself is the first step.
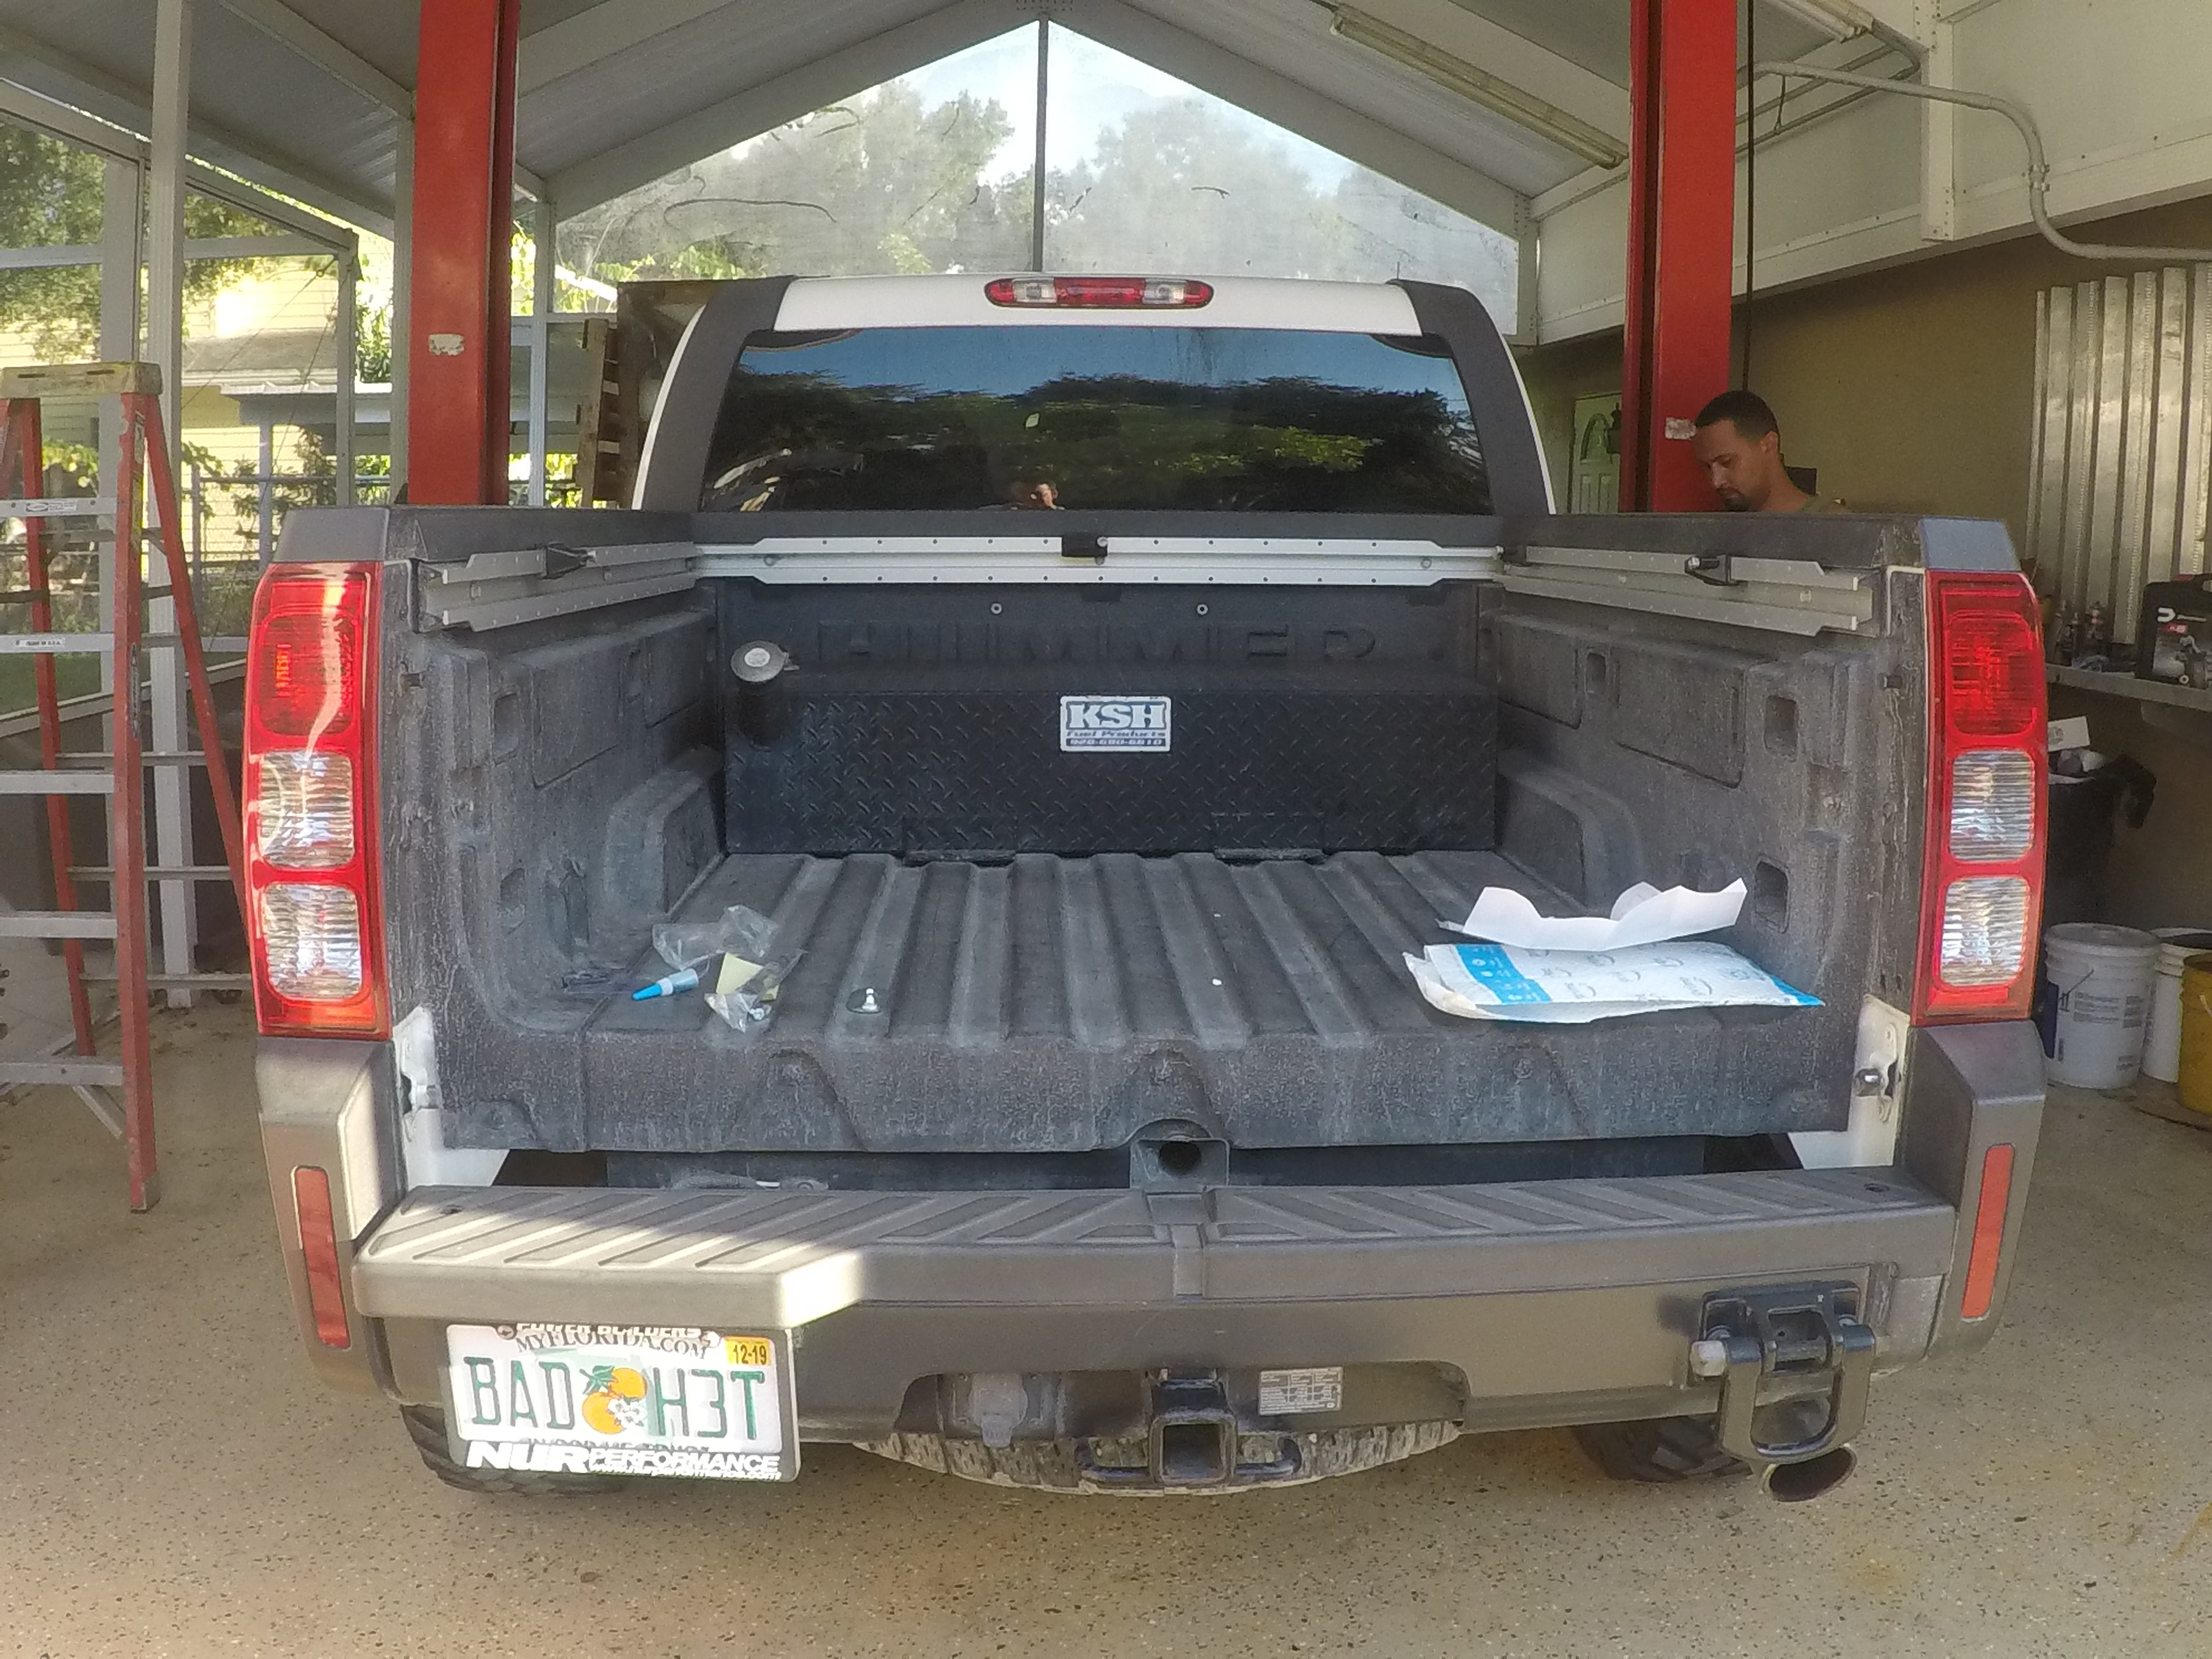
And there she is. The tailgate assist is installed.
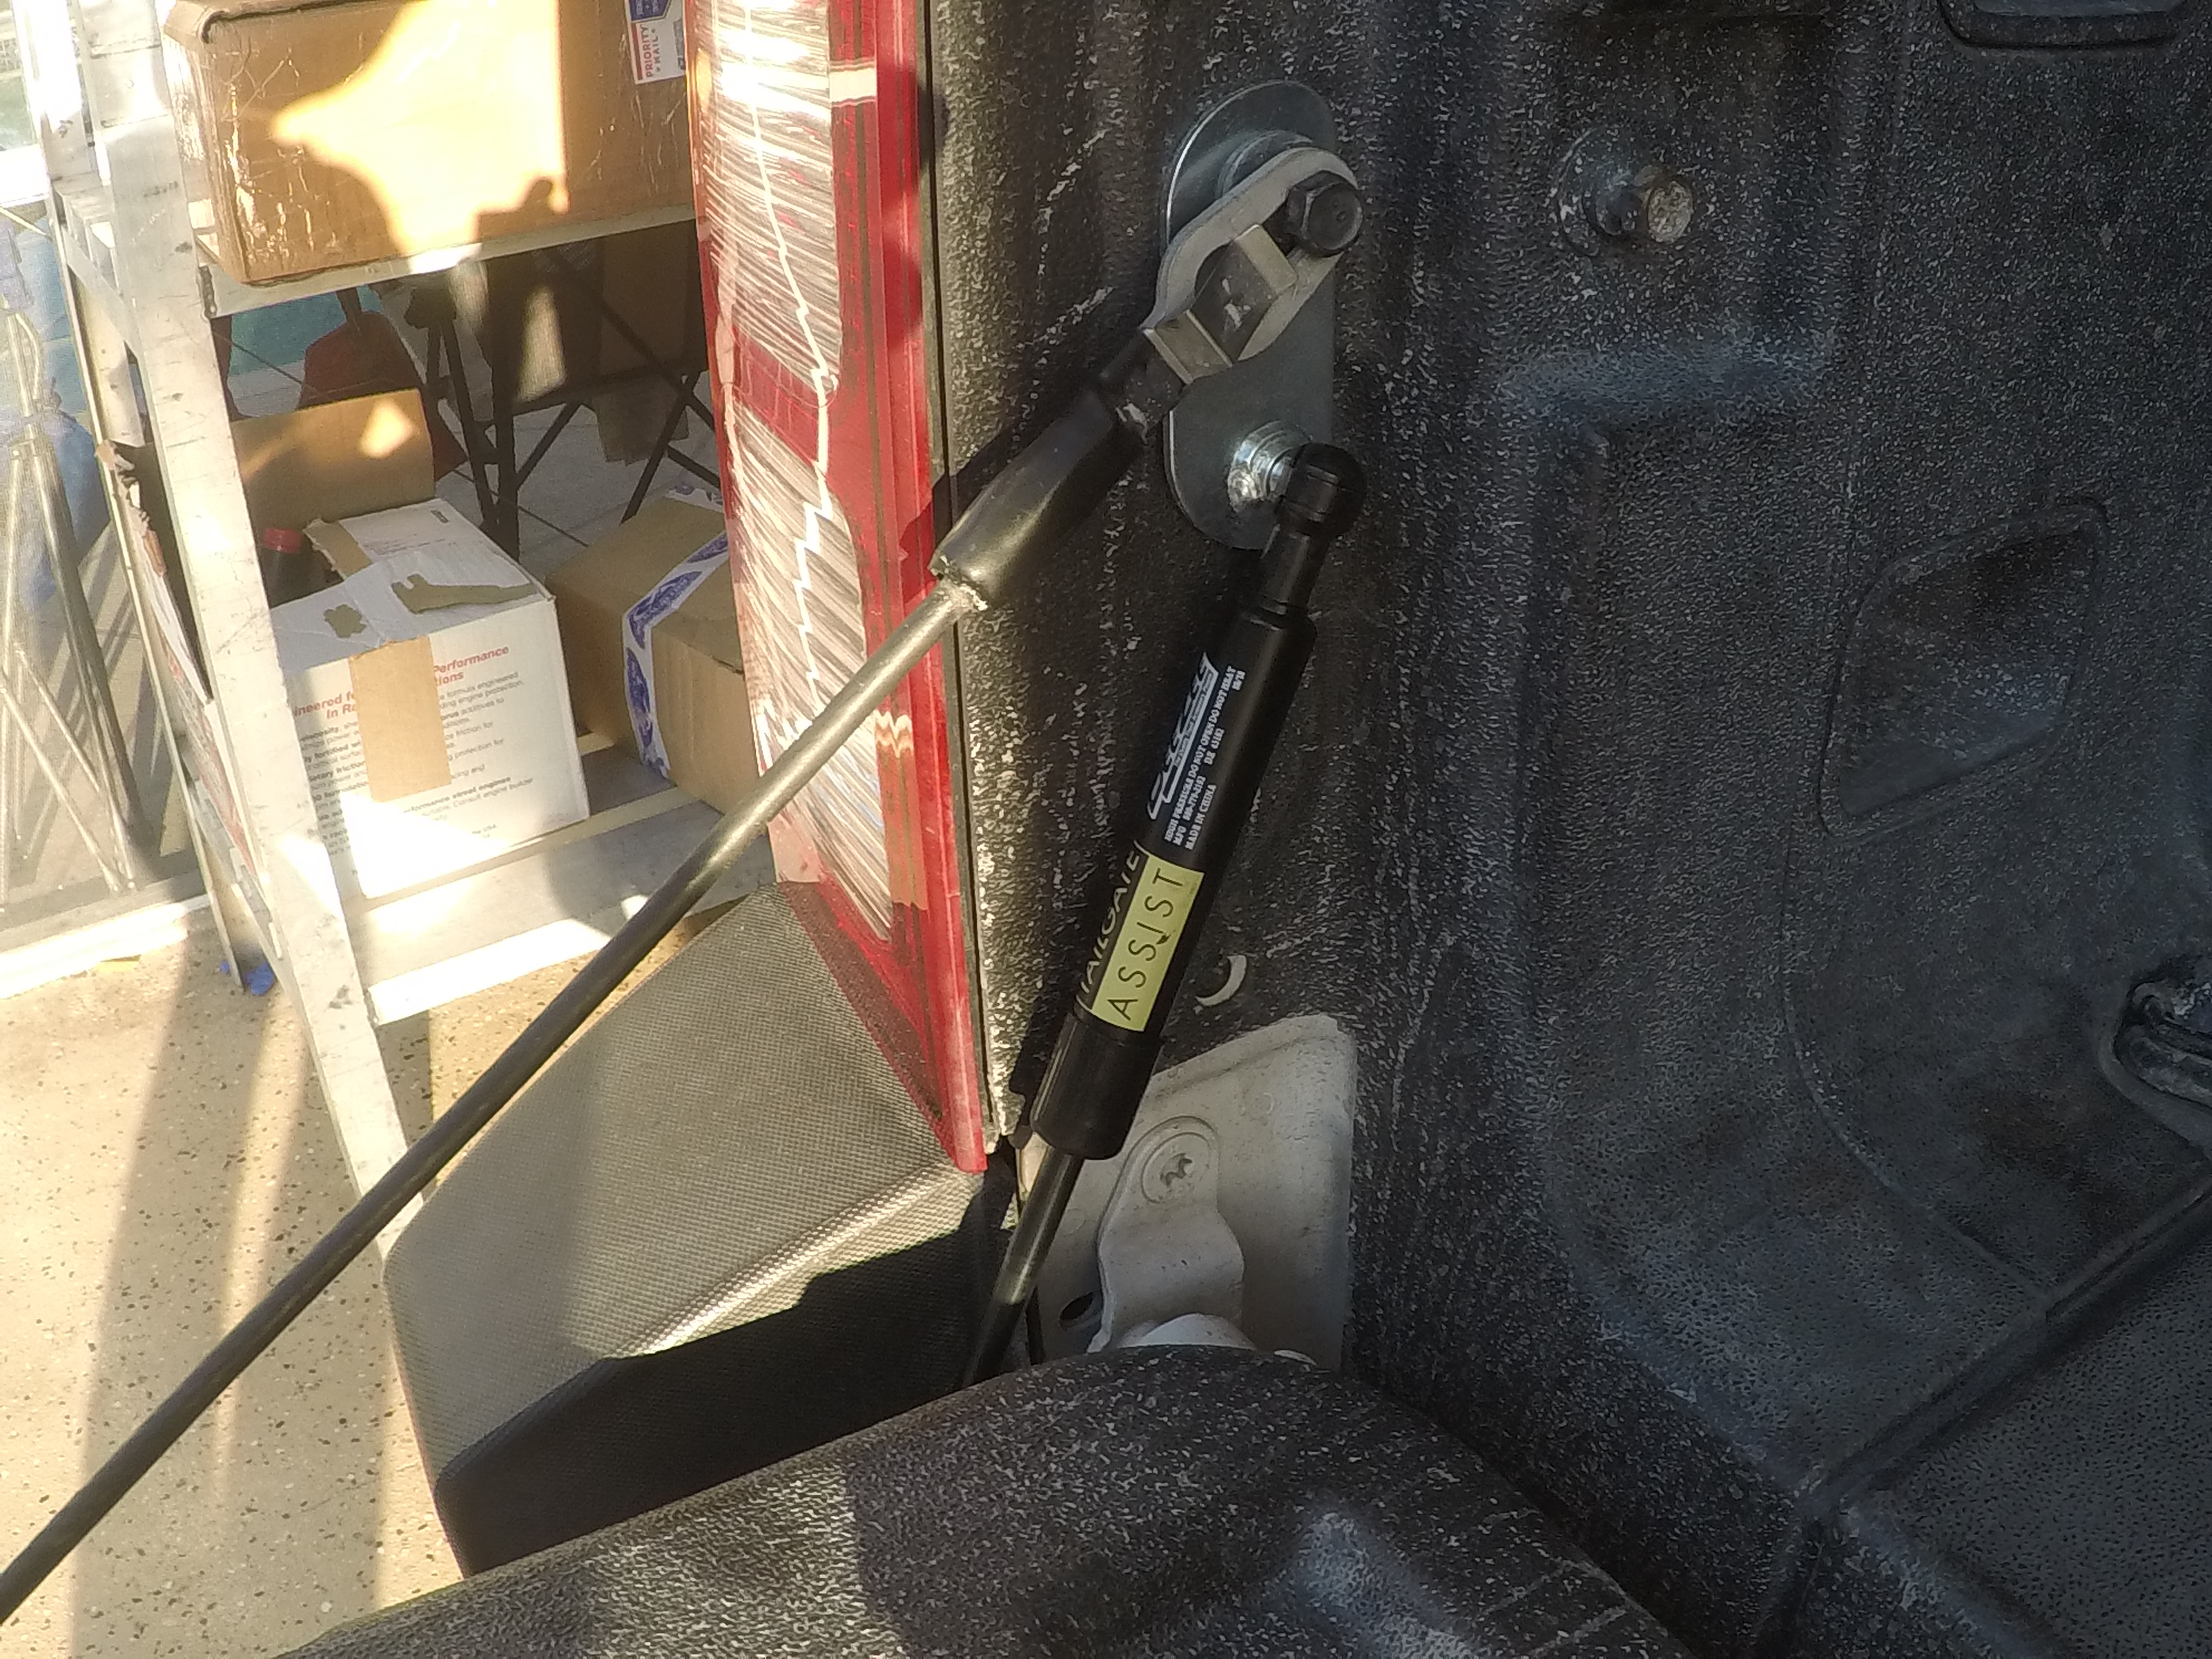
Much better.
Next is a bit more cheap power and sound, so under the truck we go.

Did a bit of cutting to the stock exhaust...

And for fun, here is what a untuned cammed Alpha V8 sounds like with just the headers lol.
Will have to link later via YouTube...
As you can see my Alpha has two sets of cats. Here in FL, we don't test for emissions and etc. so the rears went bye-bye, and the fronts had an appointment with a hammer and a pry bar lol.

After punching out all of the cat material out of the primaries, we bolted them back up to the headers and then welded in a straight section to replace the rear cats. Here's my buddy welding the straight section for me since I have little welding experience.

The Duke is all welded up and sounds great! If you're looking to free up some cheap power and pick up some more exhaust notes and can weld a bit, this is an easy way to do it. Made sense for me to do it because I live in Florida and also because I will need a tune anyways for the camshaft swap. But if you don't want to tune your rig, then you can always just cut out the rear cats and be done with it. Removing the front cats will 100% need a tune or you will get the Check Engine light to come on.
Most of you know what this is. Daystar dash panel. Simple install in 30 seconds and looks good imo.
Next is a nice little mod to the tailgate so removing the tailgate itself is the first step.
And there she is. The tailgate assist is installed.
Much better.
Next is a bit more cheap power and sound, so under the truck we go.
Did a bit of cutting to the stock exhaust...
And for fun, here is what a untuned cammed Alpha V8 sounds like with just the headers lol.
Will have to link later via YouTube...
As you can see my Alpha has two sets of cats. Here in FL, we don't test for emissions and etc. so the rears went bye-bye, and the fronts had an appointment with a hammer and a pry bar lol.
After punching out all of the cat material out of the primaries, we bolted them back up to the headers and then welded in a straight section to replace the rear cats. Here's my buddy welding the straight section for me since I have little welding experience.
The Duke is all welded up and sounds great! If you're looking to free up some cheap power and pick up some more exhaust notes and can weld a bit, this is an easy way to do it. Made sense for me to do it because I live in Florida and also because I will need a tune anyways for the camshaft swap. But if you don't want to tune your rig, then you can always just cut out the rear cats and be done with it. Removing the front cats will 100% need a tune or you will get the Check Engine light to come on.
#20
10-15-2021 | 02:44 PM

Super Moderator
Joined: Jul 2007
Posts: 12,491
From: Boat Town USA MI
..."draining all the GM antifreeze from the system and replacing with Redline Water Wetter since the truck doesn't need the antifreeze properties here in FL and the Water Wetter cools much better."
Since when???? Antifreeze is not just for freeze protection and a Mustang is a far cry from a 5000# H3T.
• Antifreeze keeps the water in your radiator and engine from freezing in cold temperatures.
• Antifreeze also keeps that same water from boiling over in hot temperatures.
• Antifreeze also serves as a lubricant for the moving parts it comes in contact with, such as the water pump.
The main ingredient in the coolant used today is ethylene glycol. If it is mixed correctly (a 50/50 mix of antifreeze and water is ideal), the ethylene glycol can keep your radiator fluid from freezing even in temperatures reaching as low as 30 degrees below zero and also keep those fluids from boiling in temperatures reaching as high as 275 degrees Fahrenheit.
Otherwise, cool beans! Get the pun there?