
Gpcalero's "The Duke" H3T Alpha Build
#111
 06-22-2024, 04:50 PM

Next on the list...
...but first! My first time seeing an H-Ev up close and not on the highway. I honestly think they are pretty sharp, and I'm not a big EV fan currently!

I wanted to get a side-by-side shot, but didn't want to be the ****-hole who took up an EV charging spot with my tank of a truck. But it would have been funny lmao

So, anyways... next on the list are these seat riser molle panels from Badland Industries.

They look decent and are unfinished, so away to paint or powder they'll go if you purchase. They serve as additional height for your legs in the front of the truck, as well as being able to mount/store additional items like below...
Here's a picture directly from Badland Industries website, showing as a mount for a flashlight or a fire extinguisher (which is a good idea in my opinion). They fit the Colorado, Canyon, H3 & H3T.

And here's another view about to prep for paint. Wiped them down with alcohol to remove any potential oil/grease/etc. prior to them arriving.

I decided to go with the Rollbar & Chassis spray paint from VHT since I have used this on several items on the mustang. Also chose this since I already had some on hand, and the final finish wasn't a gloss black paint in appearance.

And all set! Passenger side view. Rather easy install after paint. Just loosen rear bolts on the front seats, and remove the front bolts. Place the molle panel riser and bolt back in place.

Now I have space for future storage as well as not having the front of the seats raised all the way to the max height to give more knee angle. I sit back in the seat more now while still having the rear lowered. Tons more adjustment now.
...but first! My first time seeing an H-Ev up close and not on the highway. I honestly think they are pretty sharp, and I'm not a big EV fan currently!
I wanted to get a side-by-side shot, but didn't want to be the ****-hole who took up an EV charging spot with my tank of a truck. But it would have been funny lmao
So, anyways... next on the list are these seat riser molle panels from Badland Industries.
They look decent and are unfinished, so away to paint or powder they'll go if you purchase. They serve as additional height for your legs in the front of the truck, as well as being able to mount/store additional items like below...
Here's a picture directly from Badland Industries website, showing as a mount for a flashlight or a fire extinguisher (which is a good idea in my opinion). They fit the Colorado, Canyon, H3 & H3T.
And here's another view about to prep for paint. Wiped them down with alcohol to remove any potential oil/grease/etc. prior to them arriving.
I decided to go with the Rollbar & Chassis spray paint from VHT since I have used this on several items on the mustang. Also chose this since I already had some on hand, and the final finish wasn't a gloss black paint in appearance.
And all set! Passenger side view. Rather easy install after paint. Just loosen rear bolts on the front seats, and remove the front bolts. Place the molle panel riser and bolt back in place.
Now I have space for future storage as well as not having the front of the seats raised all the way to the max height to give more knee angle. I sit back in the seat more now while still having the rear lowered. Tons more adjustment now.

#114
06-29-2024, 10:22 AM
Bumper time...
I know I teased it a few posts ago, but now it's time. I purchased a new Thor Parts front bumper from CJ at the end of last summer and finally got around to installing it a few months ago.
Didn't take too many photos of it out of the box prior to installing but here's the center portion...

And one of the wings

Prior to this, I mounted the new Diode Dynamics SS3 Pro fog lights in the fog buckets that I posted earlier

Right and left sides done

(Before the taillights were even worked on lol)

And install is pretty straight forward. Basically remove the front end. Brush guard, grill, support panel, lower bumper, and the radiator support brace.

Front bumper mounted, wiring done, and testing of the new Diode Dynamics SS3 fog lights. I like these things ALOT. Kudos to Connor aka Cgalpha08 for suggesting them. Decided to go with the Pro SAE fog variants with the backlighting option. Here's a view with the bumper and the fogs on.

View with the fogs off, and the backlights ( or DRL) on. Went with the amber option. So this is what it will look like with the fogs off during normal driving

Cleaned up and organized the mess of wires hanging, and re-mounted the front bumper. Here we noticed that the factory white paint behind the center bumper grill is prominent and sticking out like a sore thumb, so time to remove the lower grill, clean up, and paint that area.

Clean and prepped.

Done.

Much better. Next part is to cut the overhanging wheel liners now that you gain much more clearance with the bumpers. You can see them just below the fog lights. Nothing a pneumatic cutter can't fix.

All trimed up and set. Brush guard reinstalled.

Good to go!
...for now.

I know I teased it a few posts ago, but now it's time. I purchased a new Thor Parts front bumper from CJ at the end of last summer and finally got around to installing it a few months ago.
Didn't take too many photos of it out of the box prior to installing but here's the center portion...
And one of the wings
Prior to this, I mounted the new Diode Dynamics SS3 Pro fog lights in the fog buckets that I posted earlier
Right and left sides done
(Before the taillights were even worked on lol)
And install is pretty straight forward. Basically remove the front end. Brush guard, grill, support panel, lower bumper, and the radiator support brace.
Front bumper mounted, wiring done, and testing of the new Diode Dynamics SS3 fog lights. I like these things ALOT. Kudos to Connor aka Cgalpha08 for suggesting them. Decided to go with the Pro SAE fog variants with the backlighting option. Here's a view with the bumper and the fogs on.
View with the fogs off, and the backlights ( or DRL) on. Went with the amber option. So this is what it will look like with the fogs off during normal driving
Cleaned up and organized the mess of wires hanging, and re-mounted the front bumper. Here we noticed that the factory white paint behind the center bumper grill is prominent and sticking out like a sore thumb, so time to remove the lower grill, clean up, and paint that area.
Clean and prepped.
Done.
Much better. Next part is to cut the overhanging wheel liners now that you gain much more clearance with the bumpers. You can see them just below the fog lights. Nothing a pneumatic cutter can't fix.
All trimed up and set. Brush guard reinstalled.
Good to go!
...for now.
#115
07-07-2024, 01:18 PM
Winch time!
Purchased a new Smittybilt gen3 X2O winch. Decided to go with the 10k version and cancel the 12k since it was back-ordered for 45 days and the 10k fits the 1.5 x weight equation just fine.
I like the wireless feature of this controller to where I don't have to have it plugged in to engage, which is nice.

At the same time, helping out my parents on their '09 H2. It has developed a few oil leaks, and annoyingly... one on the rear main seal as well. So that means separating engine/trans for new seal. So in that case.... EVERYTHING on the engine is getting a new seal. Lot of work but has to be done. This is an low mile and well maintained H2 as well so that's a bummer. Oh well, prepping to come apart she comes.

Brush guard & grill removed for winch installation. Height of the new winch is tight, even with the body lift so needed to remove the grill. Don't mind her being a dirty girl at this time lol

Mock fit with the grill put back in place. This is the clearance on the top of the winch with the bottom of the bumper, so no need to relocate the winch control box.

H2 front cover of the 6.2L engine... she's a squirter but not for long

Cutting the bolts down as they were a bit too long when going through the Thor Parts bumper. Was hitting the top of the receiving winch end.

Meanwhile, more prep to pull the engine/trans/transfercase out of the front end of the '09 H2. Almost there...

All four bolts cut down and mounted in place. Wiring done, save for the blue line. Was debating on where I wanted to piggy if off of.

Fairlead and line routing. Smittybilt fairlead doesn't look too bad actually... but already looking at alternatives lol

All set! Skid plate remounted, piggied/spliced in the blue DRL line where I wanted, grill and brushguard remounted. The blue wire on the Smittybilt is an accent light on top of the control box. Not really needed but neat. Figured I'd might as well run it since I had it.

Back home and lights on. Cannot really tell the accent light is on during the day, so bright out. Can deff see at night and dusk. The LED Smittybilt put in there could be brighter, but doesn't really bother me.


Great having a winch to pull out the Jeeps now
Purchased a new Smittybilt gen3 X2O winch. Decided to go with the 10k version and cancel the 12k since it was back-ordered for 45 days and the 10k fits the 1.5 x weight equation just fine.
I like the wireless feature of this controller to where I don't have to have it plugged in to engage, which is nice.
At the same time, helping out my parents on their '09 H2. It has developed a few oil leaks, and annoyingly... one on the rear main seal as well. So that means separating engine/trans for new seal. So in that case.... EVERYTHING on the engine is getting a new seal. Lot of work but has to be done. This is an low mile and well maintained H2 as well so that's a bummer. Oh well, prepping to come apart she comes.
Brush guard & grill removed for winch installation. Height of the new winch is tight, even with the body lift so needed to remove the grill. Don't mind her being a dirty girl at this time lol
Mock fit with the grill put back in place. This is the clearance on the top of the winch with the bottom of the bumper, so no need to relocate the winch control box.
H2 front cover of the 6.2L engine... she's a squirter but not for long
Cutting the bolts down as they were a bit too long when going through the Thor Parts bumper. Was hitting the top of the receiving winch end.
Meanwhile, more prep to pull the engine/trans/transfercase out of the front end of the '09 H2. Almost there...
All four bolts cut down and mounted in place. Wiring done, save for the blue line. Was debating on where I wanted to piggy if off of.
Fairlead and line routing. Smittybilt fairlead doesn't look too bad actually... but already looking at alternatives lol
All set! Skid plate remounted, piggied/spliced in the blue DRL line where I wanted, grill and brushguard remounted. The blue wire on the Smittybilt is an accent light on top of the control box. Not really needed but neat. Figured I'd might as well run it since I had it.
Back home and lights on. Cannot really tell the accent light is on during the day, so bright out. Can deff see at night and dusk. The LED Smittybilt put in there could be brighter, but doesn't really bother me.
Great having a winch to pull out the Jeeps now
#116
07-15-2024, 07:44 PM
'09 H2 wrap up time.

H2 engine now has all new seals & gaskets. Only thing that wasn't touched was the shortblock. Had the ports and valves also walnut blasted to remove the engine build up as well as a complete cleaning of the exterior of the engine/trans/transfercase. Not a drop of oil on her anywhere.

New engine oil and tranfercase fluid, put back together and finally on the road again! --- Side quest completed & sitting with the 6.2L H3T sibling.

New Bilstein shocks for the rear came in. Not sure how I never hit the old shock reservoir lines, but happy with the 'correct' reservoir outlets now on these units

New style. Still 5160 Bilstein rears, just different reservoir outlet design.

Old vs. new.

Have these set aside for a fellow H3T guy

Last piece of the puzzle - winch cover.

And now you're pretty much all caught up to date.... finally.
...for now...
H2 engine now has all new seals & gaskets. Only thing that wasn't touched was the shortblock. Had the ports and valves also walnut blasted to remove the engine build up as well as a complete cleaning of the exterior of the engine/trans/transfercase. Not a drop of oil on her anywhere.
New engine oil and tranfercase fluid, put back together and finally on the road again! --- Side quest completed & sitting with the 6.2L H3T sibling.
New Bilstein shocks for the rear came in. Not sure how I never hit the old shock reservoir lines, but happy with the 'correct' reservoir outlets now on these units
New style. Still 5160 Bilstein rears, just different reservoir outlet design.
Old vs. new.
Have these set aside for a fellow H3T guy
Last piece of the puzzle - winch cover.
And now you're pretty much all caught up to date.... finally.
...for now...


#120
07-27-2024, 09:05 AM

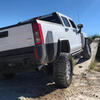
Thank you sir! Really like the Toyo MT 35s so I naturally wanted to keep the same with the larger tire size.<!--td {border: 1px solid #cccccc;}br {mso-data-placement:same-cell;}-->https://www.viberate.com/

Thread
Thread Starter
Forum
Replies
Last Post