When you click on links to various merchants on this site and make a purchase, this can result in this site earning a commission. Affiliate programs and affiliations include, but are not limited to, the eBay Partner Network.
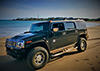
Hummer H2For those who like a little more gleam to their Hummer, the H2 offers a similar rugged look as the H1, but as a lower cost, and with more added features, making it almost a massive luxury SUV.
Ahhh that is a door lock pawl retainer. The pawl is the bit that is on the end of the cylinder that the cylinder turns.
I believe I replaced one in the past with a push on eclip and it worked just fine. The correct piece would be ideal though.
Have you thoroughly checked in the bottom of the door for it? Maybe with a magnet, might even need to use a knife or something as it might even be wedges a bit in the seam since it is so thin.
Yes I did but I might give it another shot. I figured I was calling what I needed by a name of something that I don�t!
i would not be surprised about that.
i just noticed yesterday both of my door locks have a thin horizontal line on the plastic surround, it starts at the center of the lock hole and shoots horizontally t'words the edge of the plate. i have never seen those lines there. the door paint does not look disturbed though like if someone tried prying it.
People are scumbags and nothing would surprise me. It�s difficult having something nice at times.
I received my clips and 1 1/2 hours later I got it on. Probably dropped it 50 times and my fingers are raw. The way the clip is made I had a good idea how it should go on but I wasn’t fore sure because I didn’t see how it came off. I could only get it on the wrong way and I thought about leaving it and putting a dab of silicone on the back side of it. This was after the first hour, but I didn’t give up and I took most of the curve out of it and then I was able to get it on and I also bent that little tit down more to make up for the clip being flattened and it popped right in to the hole and it’s not coming off. I had to have my Son hold the light and put some pressure on the key and it made a big difference. I got the door panel back on and it’s ready for gears on Tuesday!
Better than it was You can see how the foam fits I like how everything is painted to match the body LED bulbs looking bright and white 2,000 grit and polish until new
I got the hood and grill on, hooked up the lights and everything worked. The headlight foam rubber that I installed came out really nice and it�s a big improvement over what was there. I wet sanded and polished my front amber lights and they came out great. I like how the front end looks and it�s so much better than the raw plastics.
What an amazing job you are doing! I hope the interior matches the exterior as it definitely looks better than new. Congratulations!
Thanks, the inside is like new and I think the only seat that�s been used is the drivers seat. It has 28,000 miles on it so it should look like new. Drivers seat had a small tear at the seem when I bought it but I ordered a new cushion and cover from GM but I�m not going to put it on until it gets worse. You can see how bad the trim was Small tear from sliding out. Engine is clean and hasn�t been detailed I don�t think.
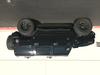
What is the mega fuse added on to the fuse box for? Many are not aware but if you remove the entire fusebox cover (not just the upper lid and you have to first remove the corner fender brace by the firewall, there is a factory provision to add that exact type fuse right on the fusebox for accessory use. Very handy and gives a nice clean factory look. There are also two power studs that are fused to the two corner square fuses as well. Here is a photo that shows them. The mega fuse gets bolted down into the recess on the right circled spot that even has plastic clips to hold it in with the stud being the output. The two fused studs, one is already used by the factory trailer wiring, but the other is open for use, just add a fuse. This view is sort of upside down from what you would see looking over the driver fender at it but shows it well.
I believe it’s for the amps and stereo stuff? It’s is 150A so it must go to something that takes a lot of power. I had the fuse box open when I did the DRL at night fix but I didn’t really pay attention to anything else in there because electric is my kryptonite.
Cowl and the 2 caps were repainted because the clear was looking bad. Almost have it back together. Fluid change and some paint work really snowballed! Way over budget but everything turned out great!
I was taking advantage of the cool but hot morning and I cleaned out underneath the cowl and installed it and the windshield wipers and it took me a minute to figure out what wipers went where. I will not put the fender liners and the fender flares on until after I get it back from gears being done. It�s starting to come together and I can�t stress enough to bag and label your parts because I was apart for 2 months and without that I would still be scratching my head. I need to throw the spare tire on but I need to figure something else out because I�m missing parts and I have to remove the license plate to get the spare off and it�s held on by Allen heads. I really think with the tire size it would be almost impossible for me to change it on my own. I can get it off the carrier but I don�t think I could get it back on.

 05-30-2019, 01:23 PM